
(Part 3 in a 10-part series)
There are several ways that you can create Bicep files:
- Create them by hand (with a little help from IntelliSense this is doable, but only as a last resort…)
- Copy from someone else (the developer’s favorite method! See the References section below for my favorite repositories to copy from)
- VS Code Import
- Reverse Engineer ARM files
- Use a Bicep Container Registry
The first two are pretty obvious, so I won’t say any more about them, and the Bicep Container Registry will be covered in a future post.
VS Code Import
Once you have the Bicep Extension for VS Code installed, this is a very slick way to start if you have a resource in Azure but do not have a Bicep or ARM file for that resource – all you need is your full Resource Id. The quickest way I know how to find that is to pop out to the Azure Portal and navigate to the resource in question. Click on the “JSON View” link in the upper right corner, then use the Copy button to copy the full Resource ID to your clipboard.

Once you have that, return to VS Code, popup the command pallette and select the “Bicep: Insert Resource…” command and paste your Resource Id:

And it’s as easy as that – quick as a whistle, you have your Bicep file…!

Bicep Command Line Tool
You can also run the “az bicep” command line tool in the Terminal window in VS code to manipulate files (or outside VS Code too…).
To create Bicep from an ARM JSON file, use the “az decompile command”:

Likewise, to create an ARM JSON file from a Bicep file, use the “az build” command:
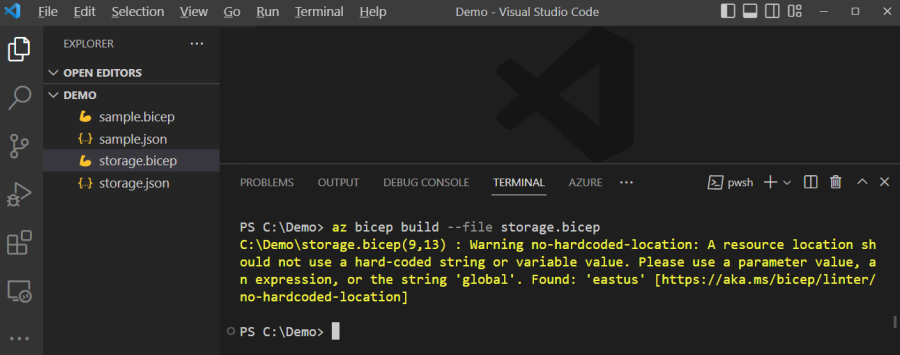
Good raw data, not so good structure
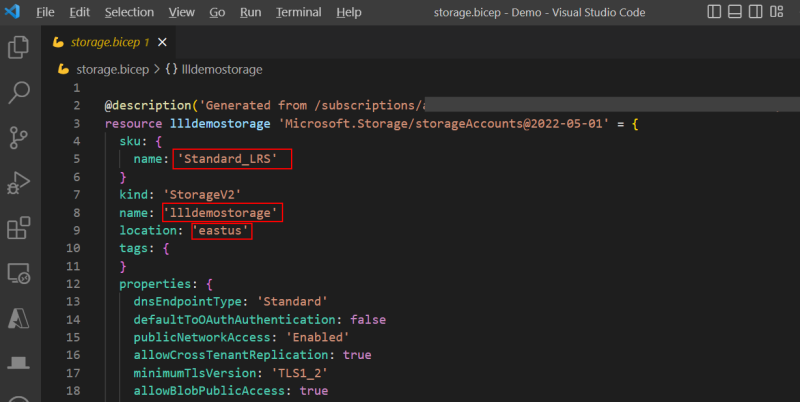
Of course, what you’ll find with these types of tools is that they do the job they are designed to do, but it’s not quite what you really want or need, so you’ll have to edit it a bit.
When creating Bicep files, you need to consider reusability, generalization, parameters, and defaults. Take this storage file import, for example. It was imported perfectly, but the next time you use this Bicep file you will probably need to be able to change the name of the resource, or the location or SKU, so the parameters created are not good.
One of the biggest things you’ll have to address when creating Bicep files is how they will be reused and creating the parameters and naming standards that you will want to use. For example, here’s a storage.bicep file with parameters and defaults to use when creating storage accounts, where there are reasonable defaults that can be used or overridden as needed. All you *HAVE* to supply is the name and everything else will default.

* Note: You might think it would be better to put a default of string = ” on line 4, so that the calling main.bicep file would be forced to supply a name. As we’ll see in the post about PSRule validation, doing that will cause the Bicep validation routines to throw a warning.
Using Modules
Once you’ve created some Bicep files you can use as building blocks, then it’s easy to start reusing them to create your applications. Here’s a partial example of creating a function app with a storage account, service bus, and Cosmos database. You can do it all in a few lines of code using smart parameters and variables.

You can see that this example references a “resourceNames” module – we’ll look at that in the next post. Naming things is very hard, but there are ways you can organize your code to make it much easier to use.
Unfortunately, this has the side effect of copying those Bicep files into each and every project — but wait! – there’s a fix! – use a Bicep Container Registry (coming up soon in one of the next posts!)
Testing Your Bicep File
If you want to deploy your Bicep file manually before moving it into a pipeline, you can test it by using the command window and using these commands:
az login
az deployment group create --resource-group <yourResourceGroupName> --template-file '.\.main.bicep' --parameters parm1=<value1>
Next step: Naming Things is Hard!
References
What is Bicep? | Microsoft Learn
