
(Part 7 in a 10-part series)
The Azure Developer CLI (azd) is an open-source tool that accelerates the time it takes to get started on Azure. azd provides a set of developer-friendly commands that map to key stages in a workflow (code, build, deploy, monitor).
If a project is configured to use azd, then these commands and notes apply. To learn how to make a project compatible with azd, see Making Your Project ‘azd’ Compatible.
Commands
The three commands of most interest are:
- azd up: provisions Azure resources, builds app, and deploys it to Azure
- azd provision: provisions Azure resources
- azd deploy: builds app and deploys it to existing Azure resources
Typically, a developer with either use the “azd up” command to do everything at once or do the provision and deploy commands separately.
Environment Names
When this command is run for the first time, a prompt will ask for the the “Environment Name”, the Azure Subscription to use and the Azure Region to deploy to.
NOTE: the “Environment Name” is not an environment code like [“dev”/”qa”/”prod”]!
Choose the “Environment Name” carefully, as it will be used as the basis to name all of the resources, so it must be unique. Use a naming convention like [yourInitials]-[appName] as the format for Environment Name.
For example, if Environment Name is equal to:
xxx-function-demo
AZD will create Azure resources with these names:
| Azure Resource | Name | Must be Unique |
|---|---|---|
| Resource Group | rg-xxx-function-demo | in a subscription |
| Azure Function | xxx-function-demofunction | globally |
Storage accounts and other resources will be named in a similarly fashion.
VS Code Usage
There is a Azure Developer CLI extension available in Visual Studio Code. If that is installed, it is easy to pop up the command window like this:
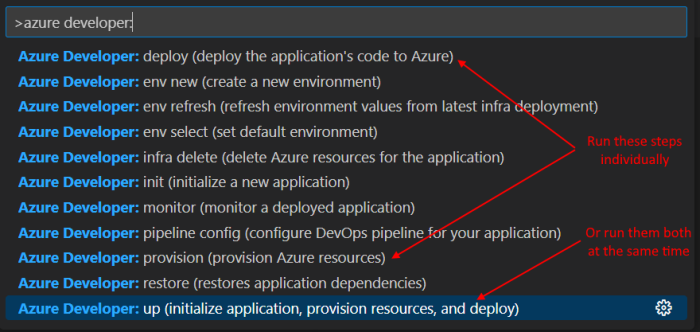
Command Line Usage
These commands can also be run on the command line, like this:
azd up
Example Execution
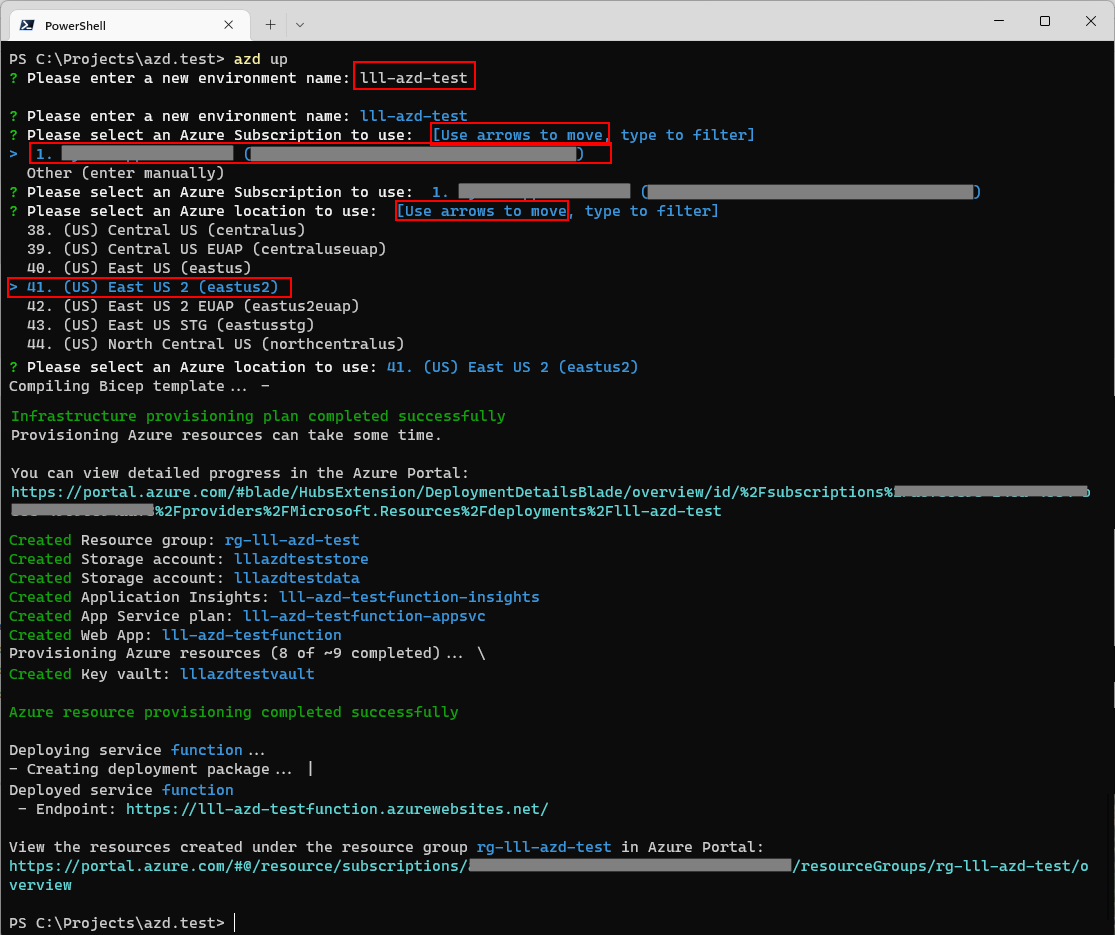
Resources Created

As you can see, if you enable “azd” in your projects, it’s really easy for others to clone your repository and get started quickly.
Next step: PSRule Validation
