
2022 Update: during the pandemic era of working from home, I’ve since purchased a really nice standup desk for my home office…!
Last year I spent a lot of time working on my book, speaking at conferences, and working on this blog. This year I’ve been focused a little more internally and haven’t written another book or signed up to speak at conferences. I’ve spent a lot of time trying to get back into the shape that I was in several years ago (before middle age gave me my current round shape!) I’ve been working out twice a week with a trainer, and playing racquetball two or three times a week, and it’s really helped me physically.
My latest effort to improve my health is to try out a standing desk. There are lots of articles out there on why standing up more is a good idea, such as these:
Sitting is Killing You (Medical Billing & Coding)
Sitting for Too Long Is Bad for Your Health (WebMD)
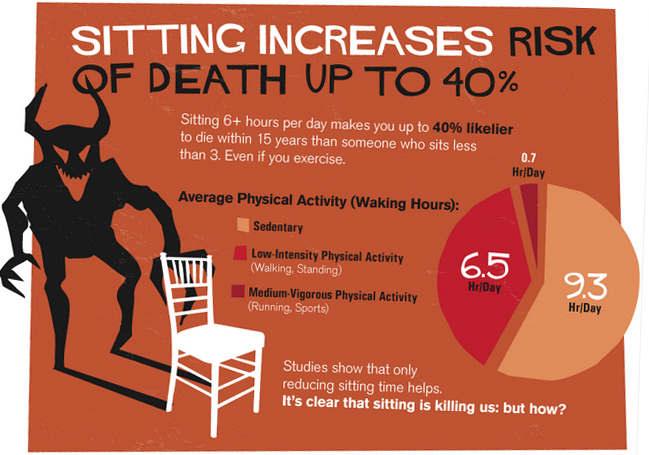
Image from Medical Billing and Coding Article
Assuming you are interested in trying this, it takes a lot of time and effort to purchase everything and set it up just to see if you like it or not, so I came up with a very quick and inexpensive temporary solution. I’ve got a cubicle with enough space to keep my sitting computing area and put a stand-up area right beside it. To get a feel for how I would like it, I built a temporary standing desk using copy paper boxes.

Everybody’s got these kind of boxes around their office, so it’s a matter of just a few minutes to put some up on your desk and find the right height for you and give it a try. Once you’ve done this for a few days and determined that this really does work for you, then you can move on to creating a nicer desk.
If you Google “standing desk Ikea”, you can find several people that have created simple standing desks for about $25 using Ikea Lack desk components, and those seem to work pretty well. However, that didn’t exactly fit what I wanted, so I set out to building my own without spending too much money. If you don’t want to go to the trouble of building it, the Ikea Lack desk is pretty simple, or you can just buy one like this on Amazon.
As I understand it, the two general ergonomic principles that you want to follow is that the top of your monitor should be just above eye level, and your keyboard should be at or just below your elbows so your arms are bent at about 90 degrees. Since I have a cubicle wall with adjustable tracks built into it, it made sense for me to put a shelf up there to hold my monitors, then create a simple stand for my keyboard.
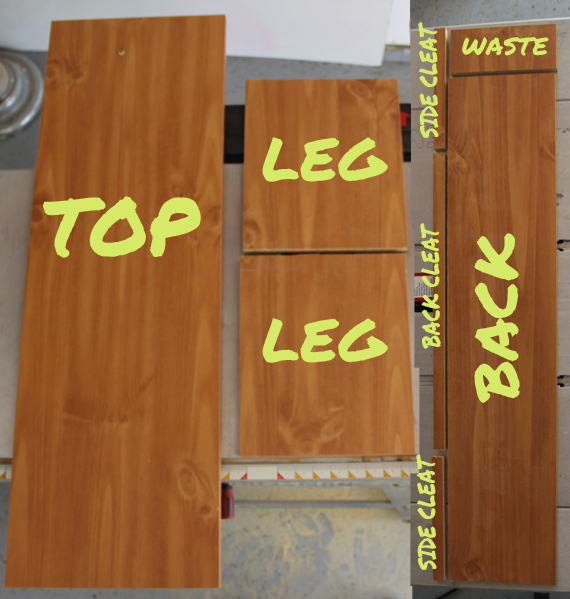
I went to my local Home Depot and picked up about $30 worth of materials: (similar products are available at any Home Depot, Menards, Lowes, etc.)
- 1 – 12” x 48” Melamine Shelf – Monitor Shelf (~$8.50)
- 2 – 12” Shelf Brackets (~$5.00)
- 1 – 12” x 36” Melamine Shelf – Keyboard Stand Top (~$7.00)
- 1 – 8” x 36” Melamine Shelf – Keyboard Stand Back (~$5.00)
- 1 – 10” x 24” Melamine Shelf – Keyboard Stand Legs (~$4.50)
- 4 – #8 1.5” screws ($1)
- 9 – #8 1” screws ($1)
Start by cutting the 24” long shelf in half so you have two 12” boards that you use for legs. I’m about 6 foot tall, and my normal desk is about 28.5” high, so this puts my keyboard at about 41” off the floor. You’ll want to adjust this height to fit your frame. If you’ve tried it out with temporary boxes, you should be able to measure it out and figure out how high your keyboard should be. If you have a table saw, split the back board so that you have a 1” x 36” strip that you can use for cleats, then cut 8” off each end of that 1” cleat board so you have three pieces. If not, you can buy a small piece of 1×2 to use for cleats – the only difference is that it won’t match exactly.
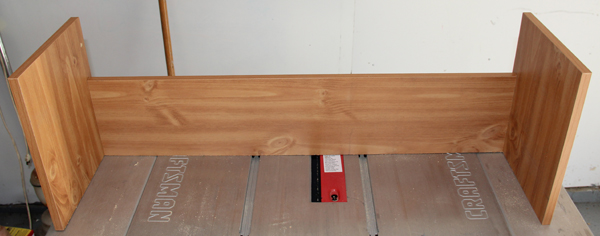
Use a countersink (if you have one) and pre-drill holes and screw the legs to the back board.
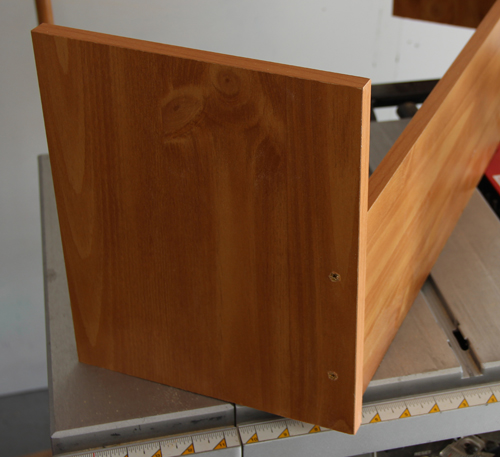
You should end up with something that looks like this:
Set the completed back board on the top of your keyboard shelf and mark out where the cleats should go, then screw the cleats to the bottom of the top board. If you’ve got a countersink drill bit, it’s best to use that to make the #8 x 1” screws set flat into the board. Be very careful when you tighten these in – if you have inexpensive lumber with a particleboard core, and you use too much pressure (for example, if you drive them in with a drill), you’ll crush the cleat and break it in half. It’s best to hand tighten these screws.
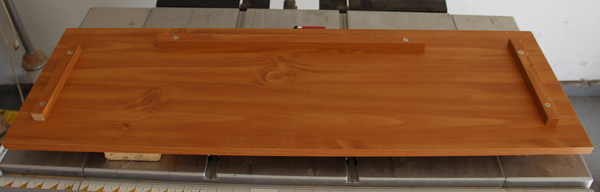
Once you have the cleats in place, drive one or more screws from the cleats into the back board to hold it in place. By putting them in here, you hide all of the screws so your finished surfaces are nice and clean.
When you are done, you should have a nice looking table with no visible screws in the top, and only two small visible screws on each side.

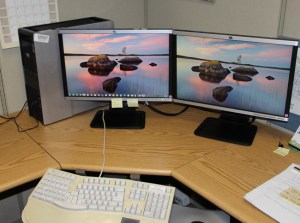
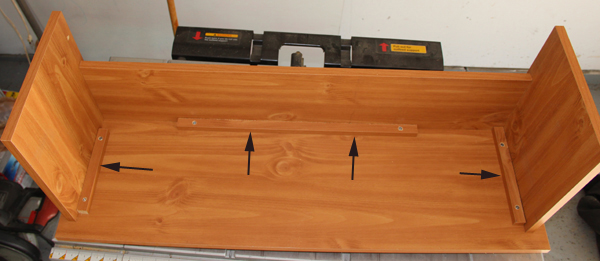
Here’s the final standing configuration on my desk:

I used a bit of black electrical tape to tape the monitor power and video cords together so that when I move them they don’t get tangled. It takes only a minute to switch between the two setups. I don’t always make it all day standing – part of that depends on what else I have going on. If I’ve had a hard workout in the morning, or if I’m playing racquetball later in the day, I’ll spend more time sitting. Other days I’ll spend most of the day standing. Either way, I’ve got the flexibility to choose.
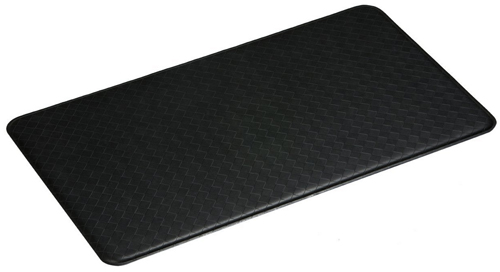
One last thing – it does tend to get a bit uncomfortable standing on your feet for long periods, so I would recommend buying a 24” x 36” Sublime Gel Mat ($42-59 from Amazon). There are cheaper ones available, but this one is highly rated and reviewed. We used this in on our kitchen and it’s a really good one that should last you a long time.
I hope this post helps you out if you’re thinking of doing this. Give it a try – if you use the copy paper box method, you’ve got nothing to lose other than a few minutes of your time. If you find out you like it, then you can pursue more permanent solutions.
